


If you’re looking for another way to increase productivity and efficiency when using your CNC router, consider using a pneumatic drill. Powerful, lighter and with a longer shelf-life than most electric tools, the pneumatic drill is an investment worth making. In this week’s tech tip, we’re going to go over some basic features and testing tips, so you can learn how to use it properly and safely for optimal performance.
Why Choose a Pneumatic Drill?
Usually, anything that is pneumatic means there is less risk of electrical shock or explosion. This safety feature is high on the list of reasons why you should choose pneumatic over electrical. But another popular reason is the dramatic increase to your productivity. With the AXYZ Pneumatic Drill, this is accomplished by:
1, Adding an extra tool for the drilling process, thereby avoiding tool changes.
2. Drilling much quicker than the Z axis motion of a drill installed in a spindle.
How does it work?
A pneumatic tool works through compressed air supplied by air compressor, with three airlines that operate it. It’s very light and can be easily added to any A2MC controlled machine.
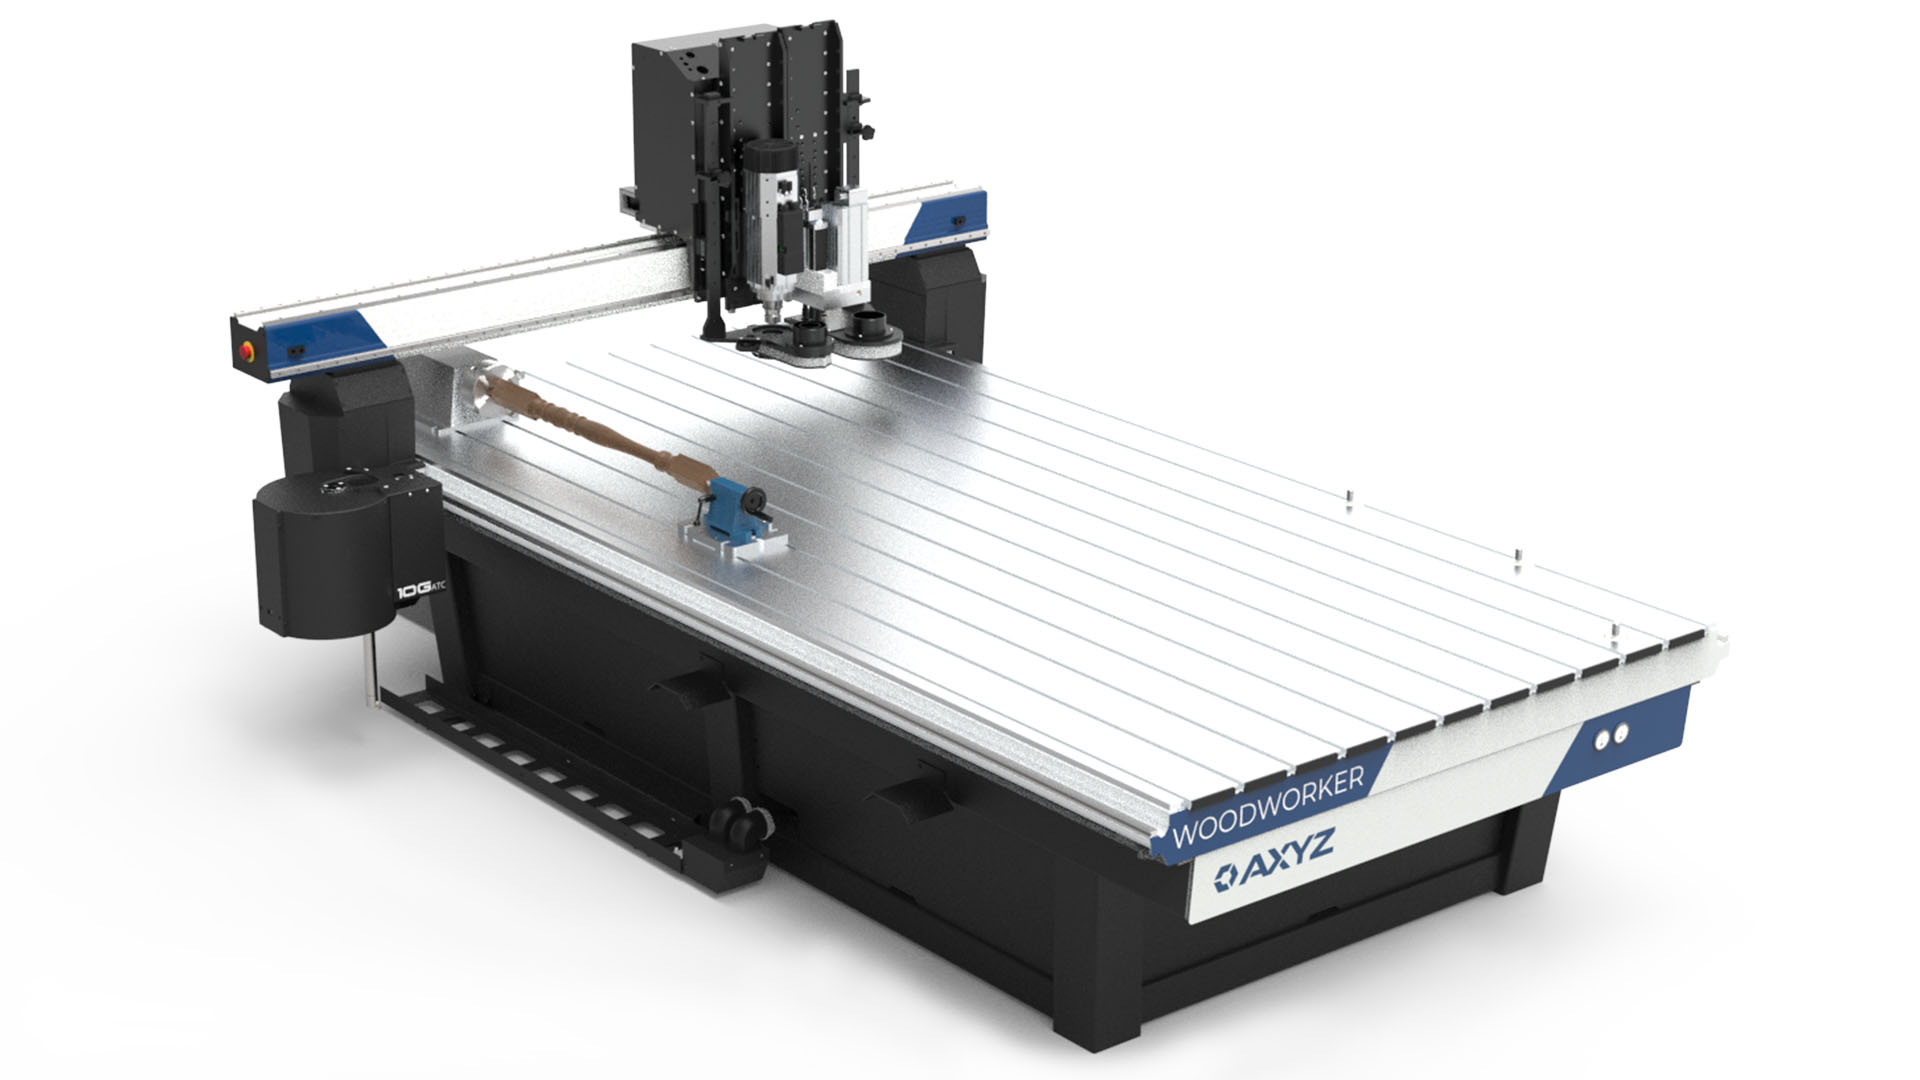
The pneumatic drill shown below operates entirely on pneumatic control supplied from the carriage board:

Important – The pneumatic drill will require at least 80 PSI (6 bar) of air pressure supplied through a 10 mm air line. The air supply must be clean and dry in order not to damage the pneumatic drill.
Testing the Pneumatic Drill
To ensure the drill is installed properly on your machine, take the time to perform the following steps:
- Press the green button on the front to test the drill manually. It should start spinning and feed downwards. While it’s running, make sure the air pressure does not drop more than 15 PSI, or about 1 bar during the drill cycle. It should also recover the pressure quickly.
- Cycle the drill several times in quick succession and watch the air pressure. If it drops and does not recover, then your air supply is insufficient.
- You can also use Function 840 to test the drill using the SMARTConsole. Enter Function 840 and the address ID of the carriage board, and then follow the prompts.
If you can fire the drill both manually and by using Function 840, then the drill has been properly set up and configured.

Part 050115 – Desoutter Pneumatic Drill Kit
Time to Shop
For the latest pneumatic tools and accessories, visit CNCshop.
If you have any questions, talk to a member of your local AXYZ Customer Care Team. We’ll be happy to answer any questions you have about adding a pneumatic drill to your Options inventory.